This FAQ will guide you how to add a camera to the app via a QR code. The following illustrations use CP3 as an example.
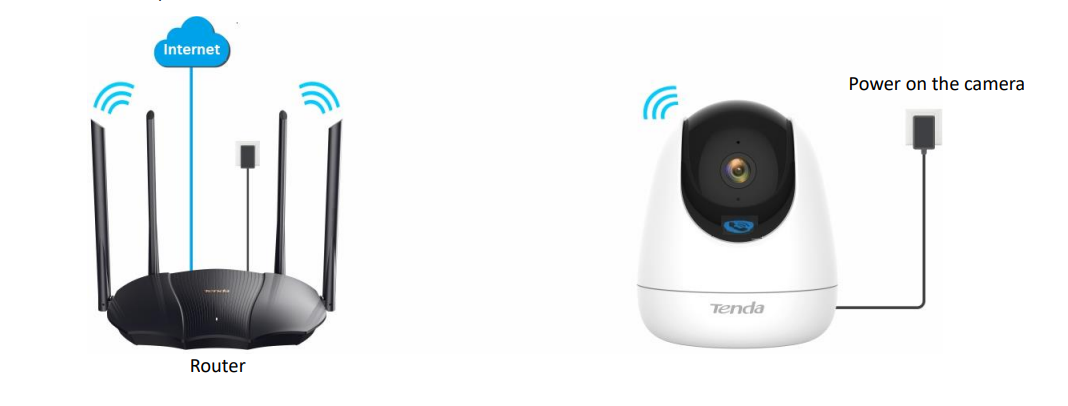
Step 1 Power on the camera.
The LED indicator lights solid red after the camera is powered on. When the LED indicator blinks blue quickly, the camera is waiting to connect to a 2.4 GHz Wi-Fi network.
Assume that the 2.4 GHz Wi-Fi information of the router is:
Wi-Fi name: Tenda_123456
Step 2 Add the camera to TDSEE App
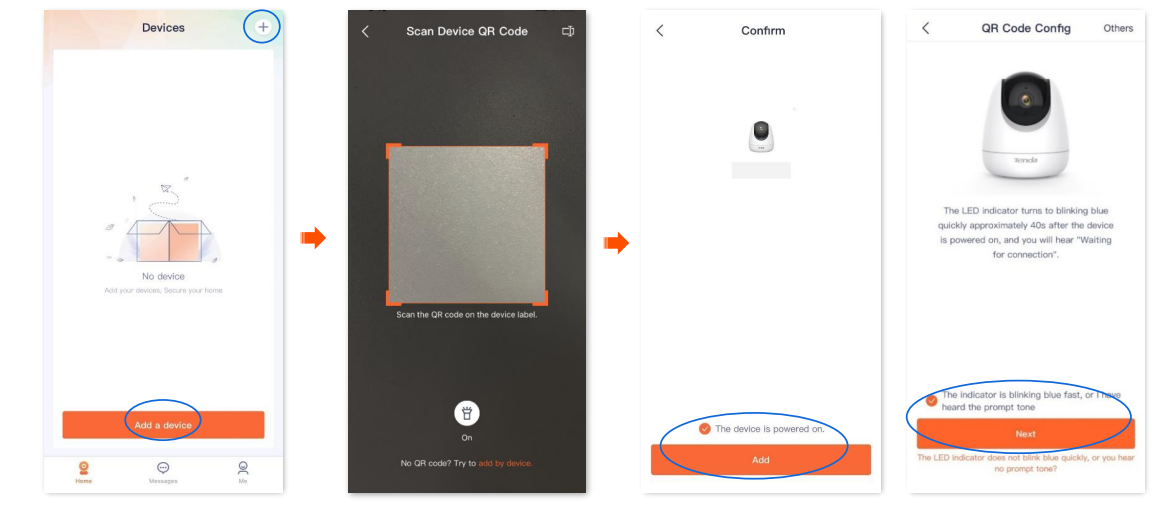
1 Scan the QR code of the camera.
(1) Open the TDSEE App on a smartphone that is connected to the internet. Enter the homepage, and tap Add a device or in the
upper right corner of the homepage.
(2) Scan the QR code on the bottom of the camera.
(3) Confirm and tick The device is powered on. Tap Add.
(4) Confirm and tick The indicator is blinking blue fast, or I have heard the prompt tone, and tap Next.
2 Connect to the router's Wi-Fi.
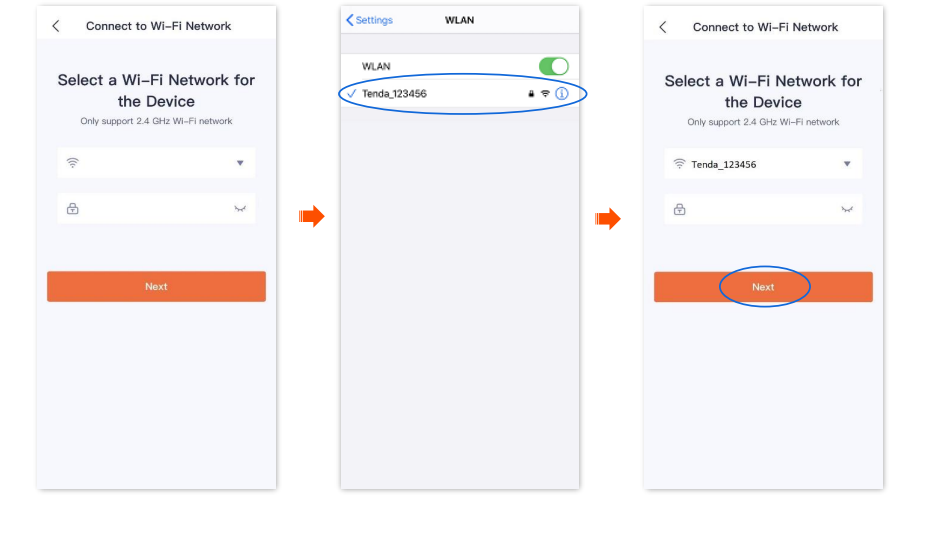
On the WiFi configuration interface, select the 2.4G WiFi you want to connect to, which is Tenda_123456 in this example,enter the password and click Next
3 Camera scans the App's QR code.
If you do not hear the prompt tone, try the following solutions:
Try moving the smartphone back and forth to adjust the distance between the screen of the smartphone and the camera, and keep each position for about two seconds.
Ensure that the camera lens has no shade or blemishes. Remove the protective film (if any) and try again.
Ensure that the smartphone screen is clear, with no cracks and no reflections.
(1)Align the lens of the camera with the QR code for scanning from 15 to 25 cm.
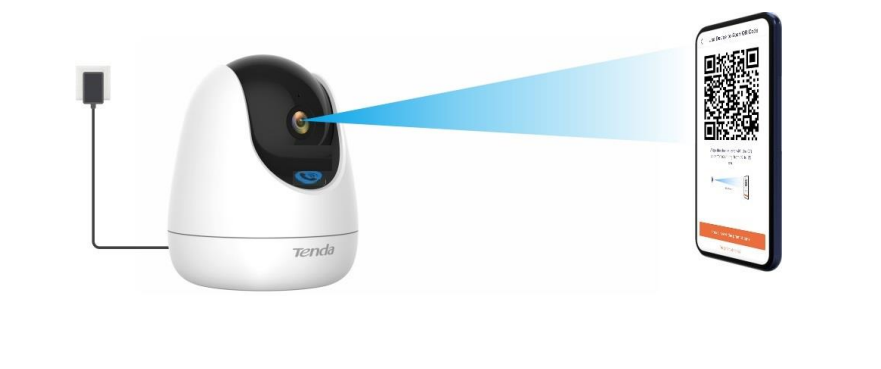
(2)When you hear a prompt tone “Connecting. Please wait”, tap I have heard the prompt tone, then the TDSEE App starts to add the device.
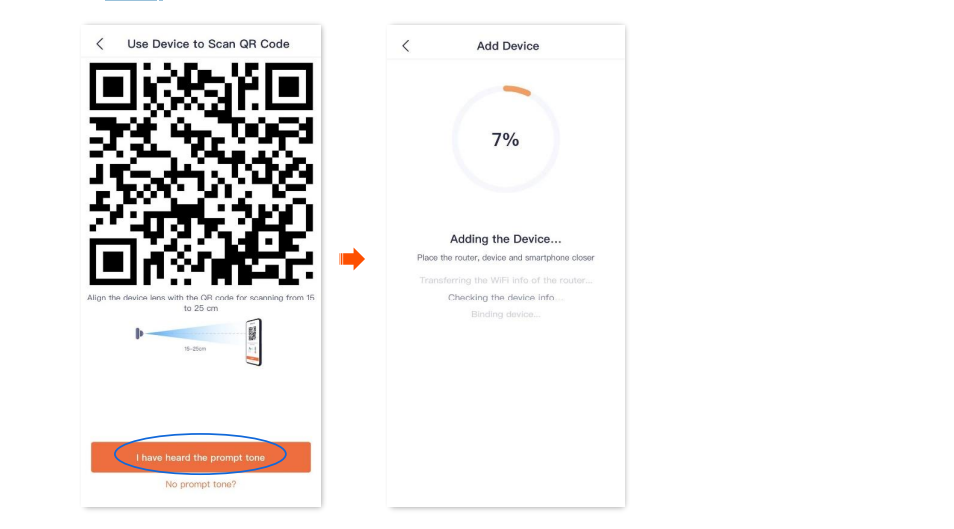
Wait a moment, and the camera is added successfully
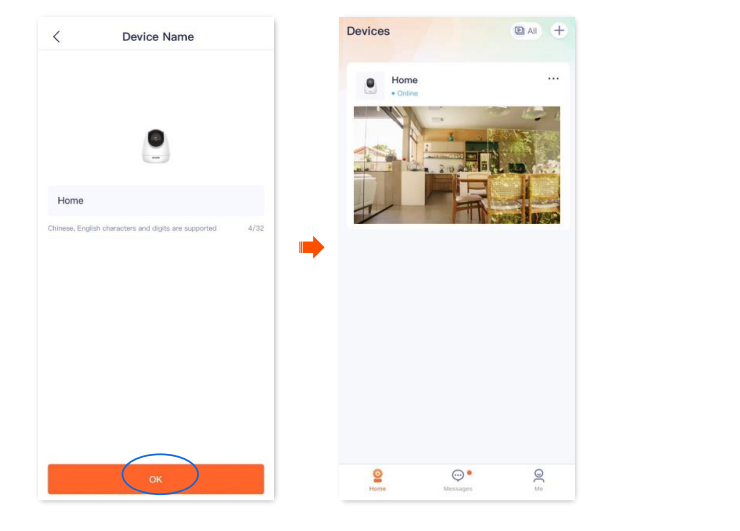
4 Name your camera.
You can name your camera, which is Home in this example. Tap OK.
