
Note: This article will guide you how to use O3 in outdoor monitoring and the steps as below.
Step 1: Connect the device as the topology
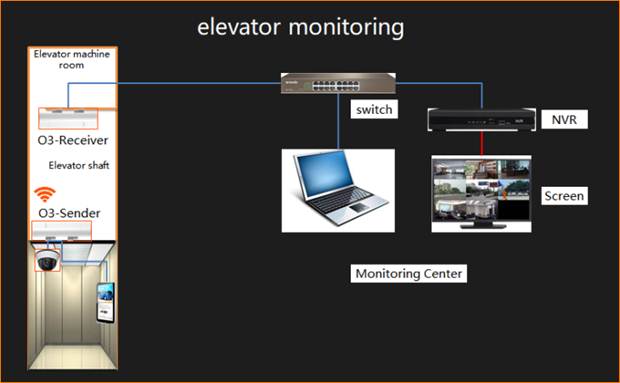
The topology is shown below:
1.1 The O3 sender is connected to the camera with the Ethernet cable, the working mode is AP mode.
1.2 The O3 receiver is connected to the switch, NVR and other equipment with the Ethernet cable, the working mode is Client mode.
Note:
a. A sender corresponds to a receiver.
b. The O3 antenna is a directional antenna. It is recommended that the O3 position of the sender and the receiver be opposite.
Step 2: Setup the corresponding operating mode
2.1 Setup AP mode on the O3 sender. If you do not know how to setup AP mode on the O3, refer to O3V2.0-How to setup AP mode
Note: When O3 bridging, it is recommended to modify the default IP address for the same network segment but different IP LAN port address.
2.2 Setup Client mode on the O3 receiver and connect the wireless signal of the O3 sender. If you do not know how to setup Client mode on the O3, refer to O3V2.0-How to setup Client mode
Step 3: Confirm that the O3 configuration is successful
3.1 After the configuration. Please check whether the configuration is successfully, login in the Setting page of the O3 receiver, click “Status”.

3.2 Check whether the configuration is successful, please check the indicators, if the indicators of O3 sender are always on and the indicators of O3 are blinking, the configuration success. Connect a computer to the switch, and then ping the IP address of the camera, if you ping successfully, the NVR can search the remote camera.
![[CPE-1] How to pair CPE (O3 as example)](/public/images/HTML.svg)
