The document applies to users of the "O3 Mode Settings"
Product Line:Tenda Outdoor Wireless Bridge O3 Question Category :Function Configure
Part 1:Configure your computer
Part 2: Login management interface of O3
②Mode two:Station Mode:Acting as a “Wireless Adapter” to connect your wired devices to a wireless network.
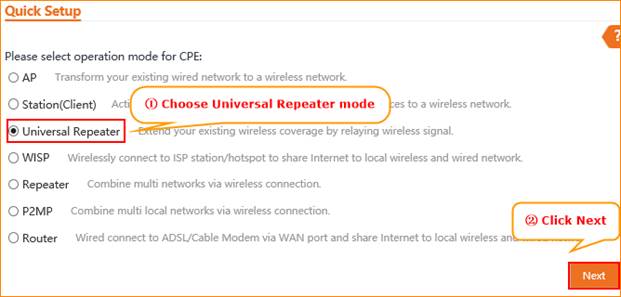
③Mode three:Universal Repeater Mode:Extend your existing wireless coverage by relaying wireless signal.
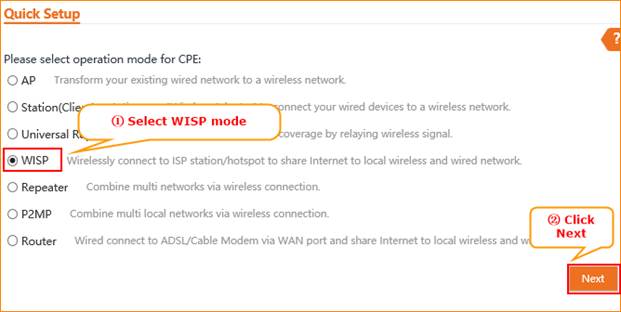
④Mode four:WISP:Wirelessly connect to ISP station/hotspot to share Internet to local wireless and wired network.
⑦Mode seven:Router Mode:Wired connect to ADSL/Cable Modem via WAN port and share Internet to local wireless and wired network.

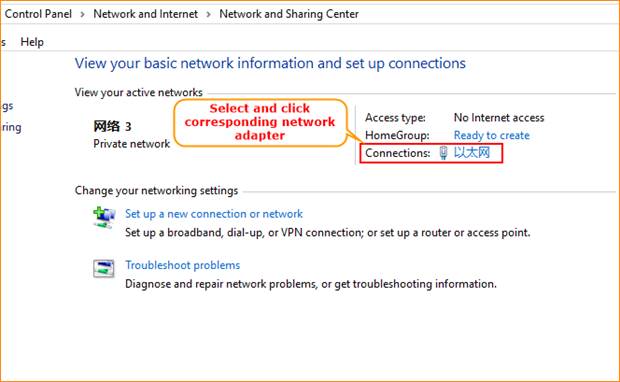
1.1 Right click icon in the lower right corner of the desktop computer, and select “Open Network and Sharing Center”.

1.2 Select and click corresponding network adapter.
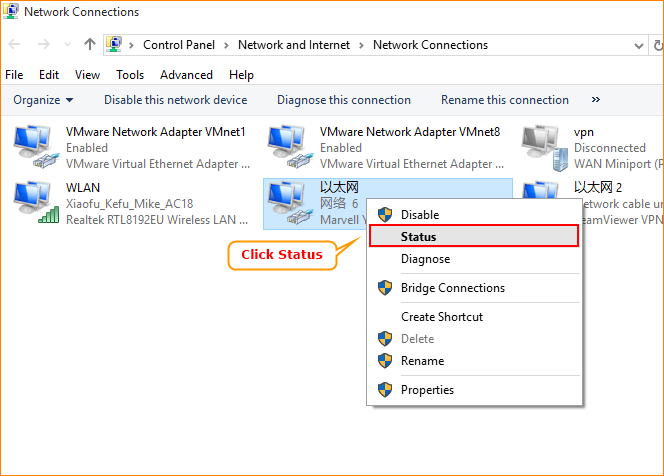
1.3 Click “Status” and then click “Properties”.

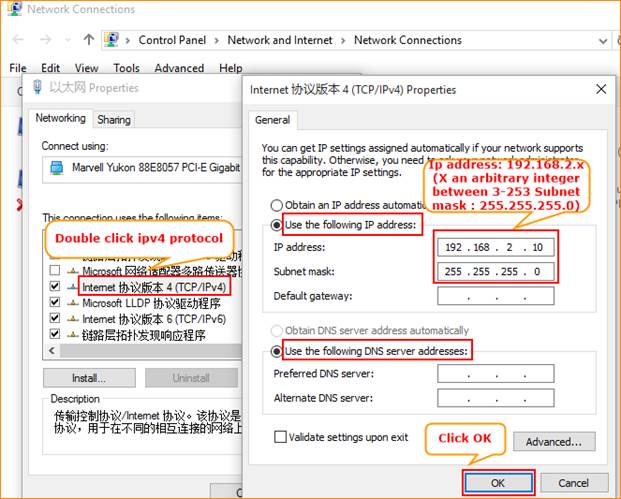
1.4 Double click “Internet protocol IPV4” And select “Use the following IP address”, “192.168.2.X” (X is an integer between 3~253),Subnet mask is “255.255.255.0”.

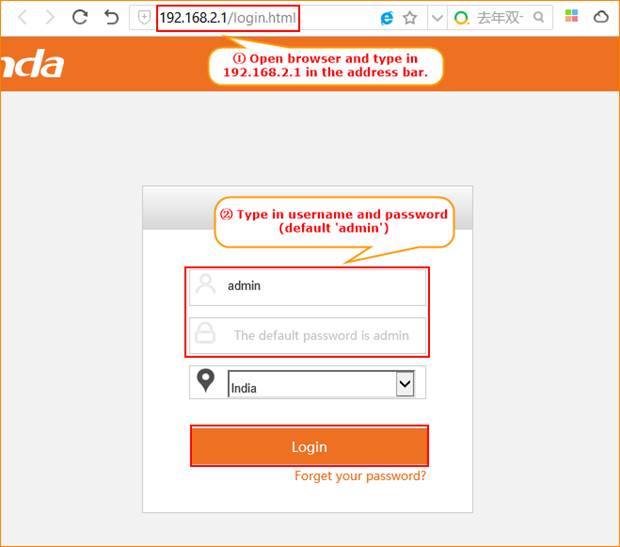
2.1 Login AP mode
Input 192.168.2.1 in a web browser’s address bar, and then press Enter or Return on your keyboard. Enter the default username and password (admin for both defaults) and click Login.

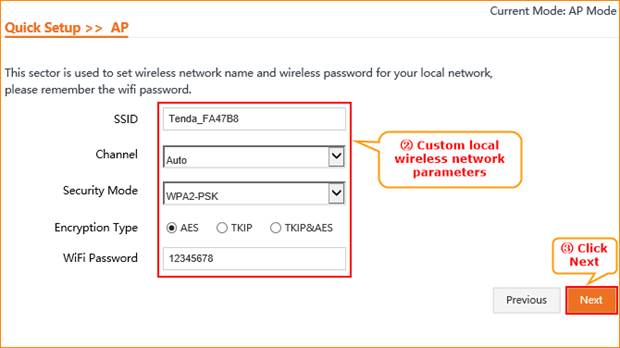
Click “Quick setup”, select “AP Mode”.

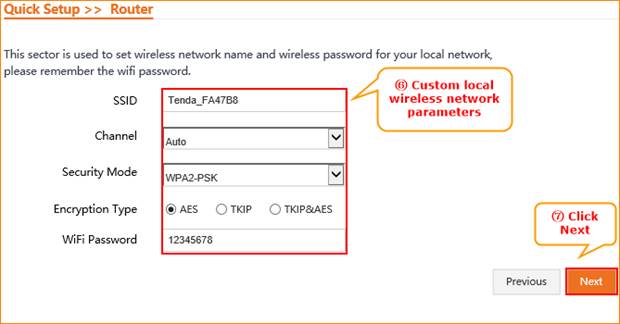
Custom local wireless network parameters and click next.
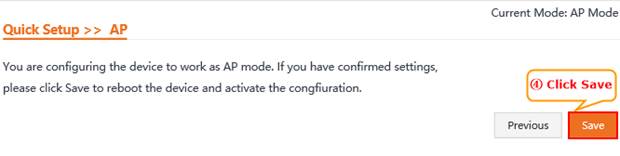
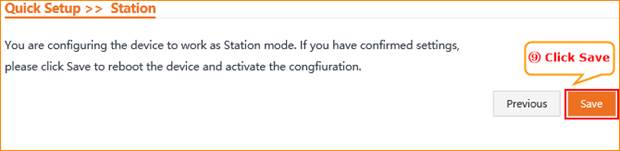
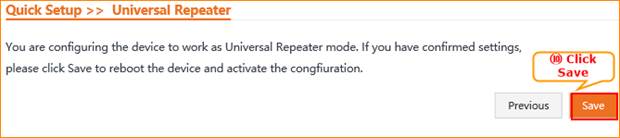
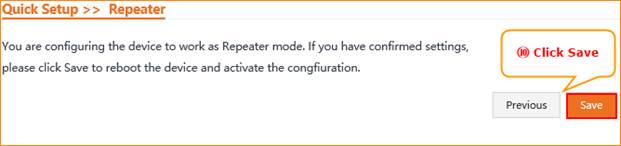
Confirm the information is correct, click "Save"
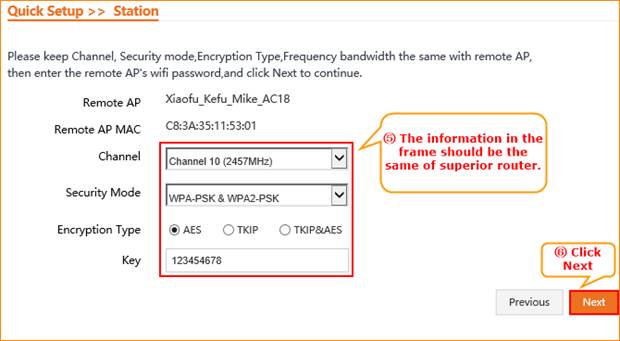
3.2 Mode two :Station mode
Select “Station mode” in “Quick Setup” option.

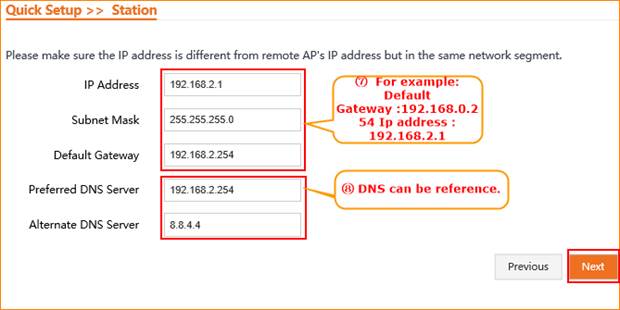
Configure local IP address, confirm it is different from superior router but in a same segment network. DNS can be reference.
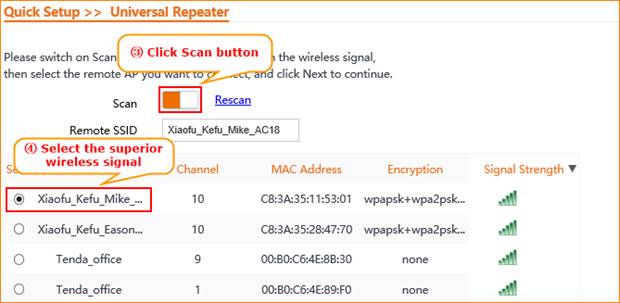
3.3 Mode Three:Universal Repeater mode
Select “Universal Repeater mode” in” Quick Setup” option.
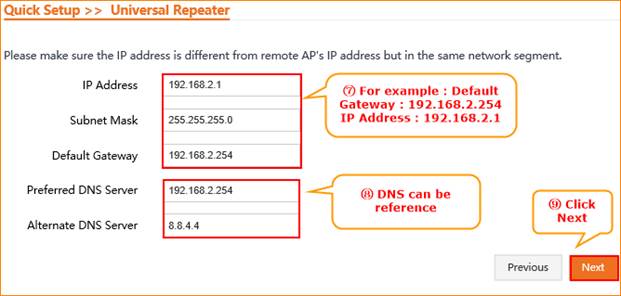
Configure local IP address, confirm it is different from superior router but in a same segment network. DNS can be reference.
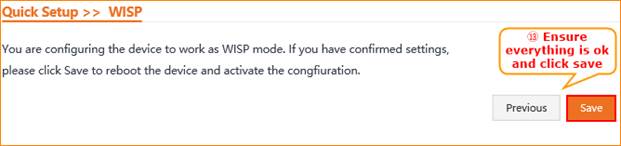
3.4 Mode four :WISP mode
Select “WISP mode” in “Quick Setup” option.
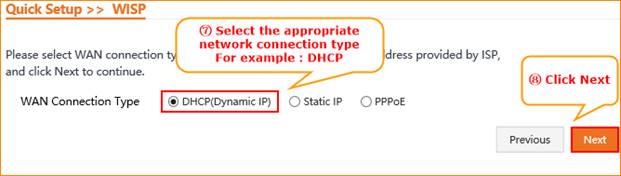
Select the appropriate network connection type and fill in corresponding information
Custom local wireless network parameters, as below:
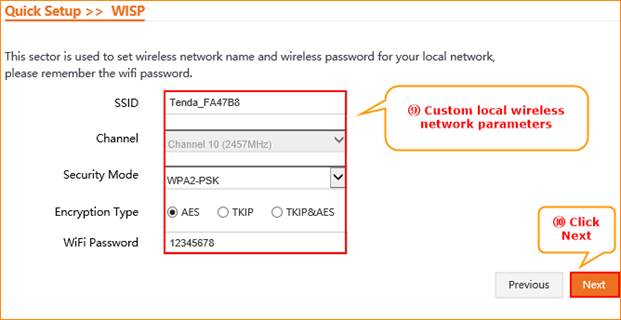
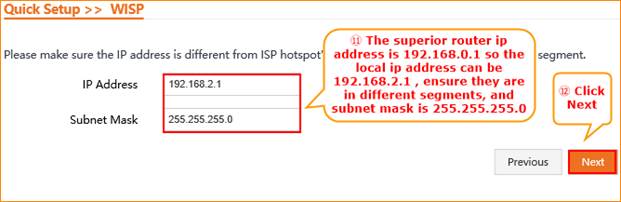
Configure local IP address, confirm it is not in the same network segment with the superior router and click next.
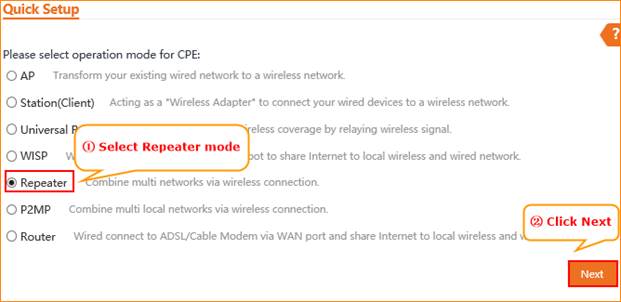
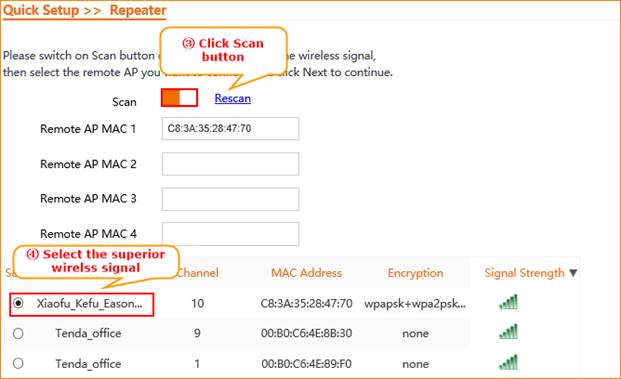
3.5 Mode five :Repeater mode
Select “Repeater mode” in “Quick Setup” option.
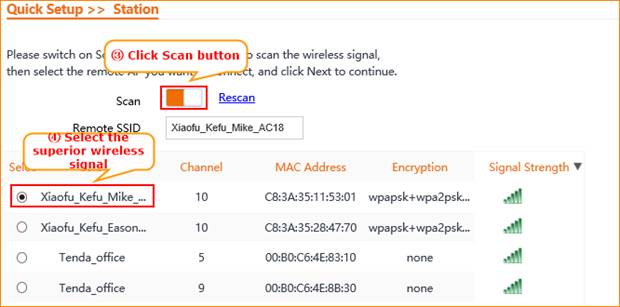
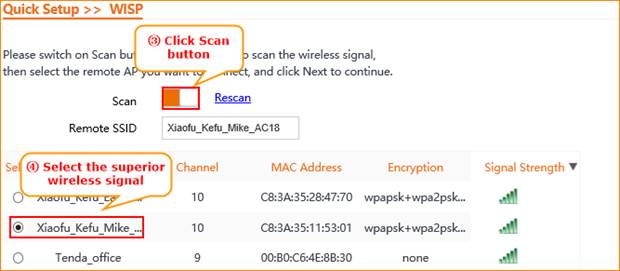
Open scan button, select the superior wireless signal which you want to extend.
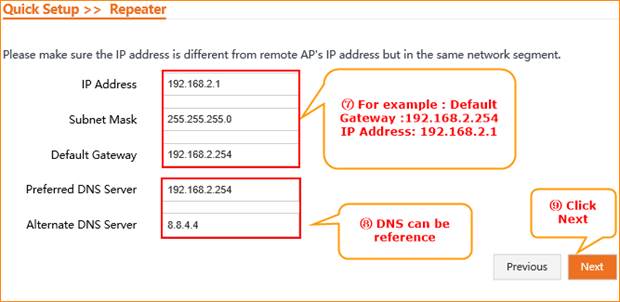
Configure local IP address, confirm it is different from superior router but in a same segment network. DNS can be reference.
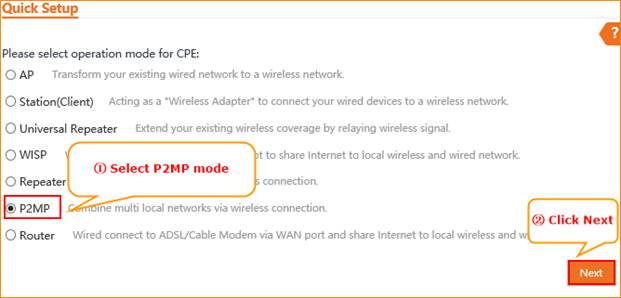
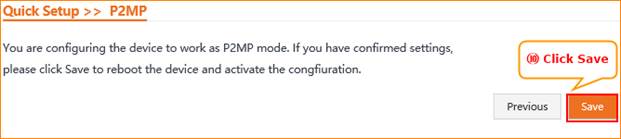
Select “P2MP mode” in “Quick Setup” option.
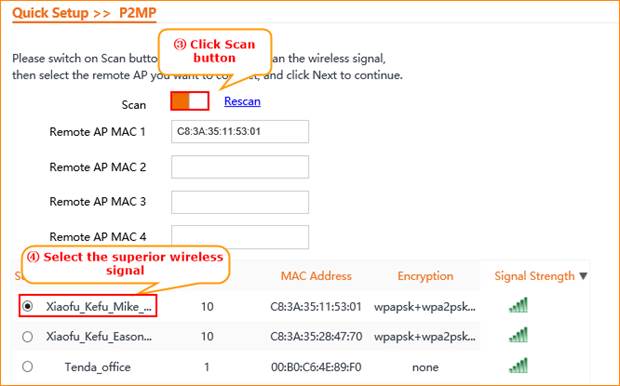
Open scan button, select the superior wireless signal which you want to extend.
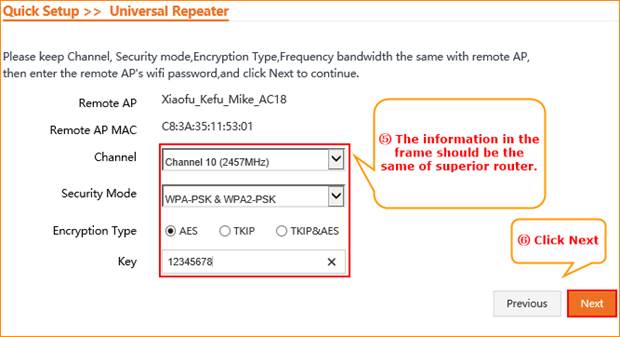
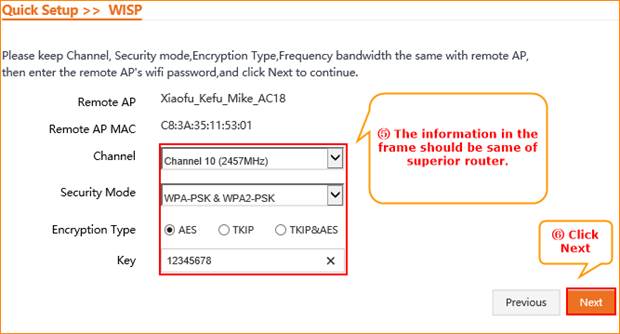
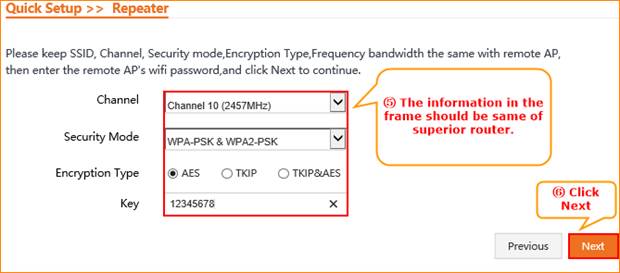
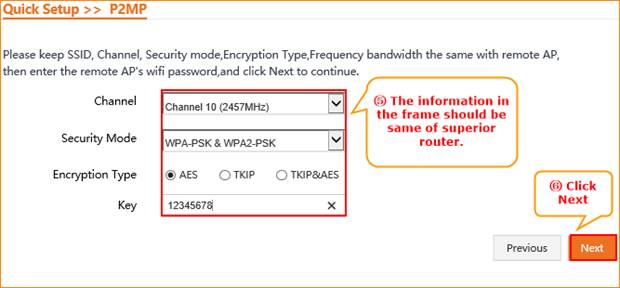
The information in the frame as below should be the same with superior router.
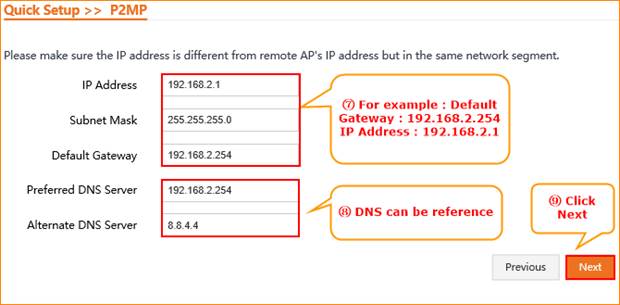
Configure local IP address, confirm it is different from superior router but in a same segment network. DNS can be reference.
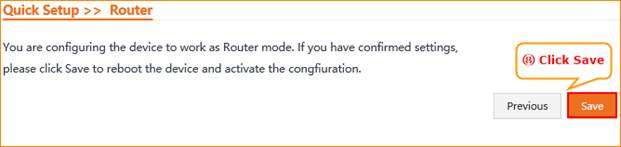
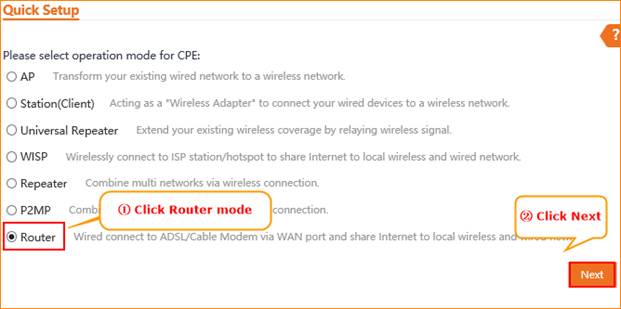
3.7 Mode Seven :Router mode
Select “Router mode” in “Quick Setup” option.
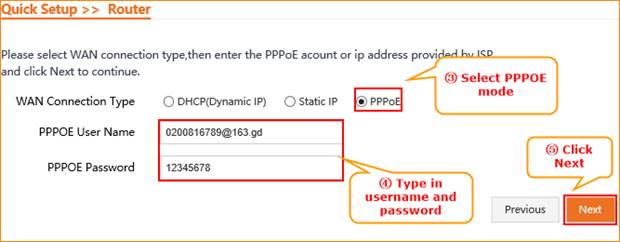
Select appropriate Wan Connection Type, for example PPPOE and fill in username and password. And click next.
Confirm the information is correct, and click “Save”.