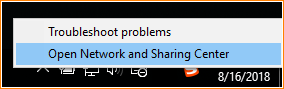
1. Right click Network Connection Icon on the system bar, then click on “Open Network and Sharing Center”.
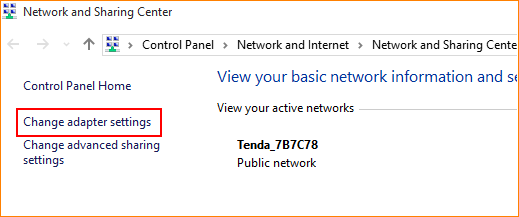
2. Click on “Change Adapter Setting”.
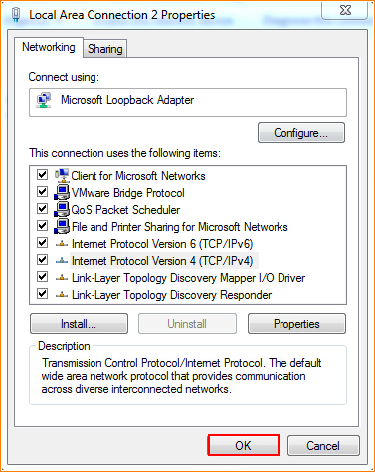
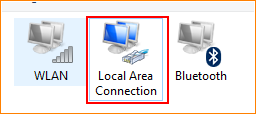
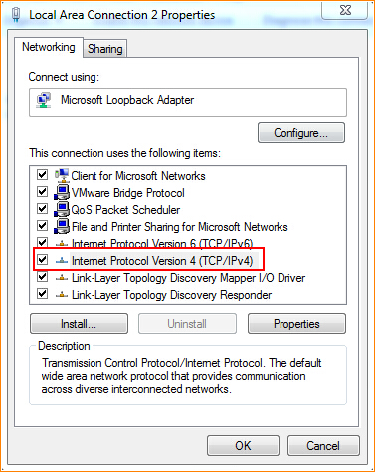
3. Right click on “Local Area Connection”, and then choose the Properties option.
4. Double click on “Internet Protocol Version 4(TCP/IPv4)”.
5. Choose “Obtain an IP address automatically” and “Obtain DNS server address automatically” and then click “OK”.
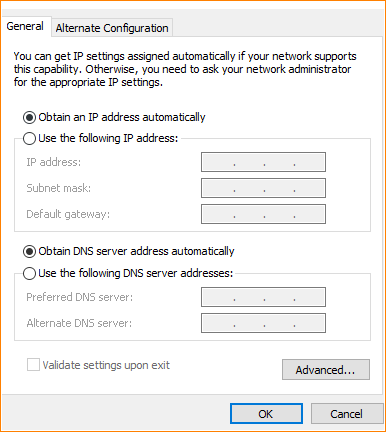
6. Also click “OK” at the last window of Local Connection Properties.