Model: V300 Question Classification: Internet Setting
Step 1: Physical Connection
Step 2: Configure the Computer
Step 3: Configure the Modem router
Step 4: Check whether it’s connecting

Connect telephone line to the DSL port the modem, and then connect computer to 2/3/4 any of the LAN ports. Physical connection shows as below.
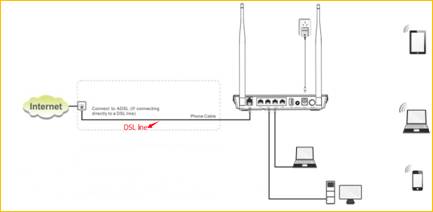
Note: When modem router is normally working, the SYS light is blinking, WAN light is solid on or blinking, and the relevant LAN light is also blinking.

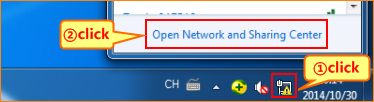
1. Right Click on Network Connection Icon on the system bar, then click on Open Network and Sharing Center.
2. Click on Change Adapter Settings.

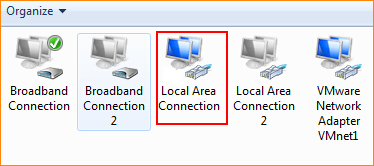
3. Right click on Local Area Connection, then choose the Properties option.
4. Double click on Internet Protocol Version 4(TCP/IPv4).
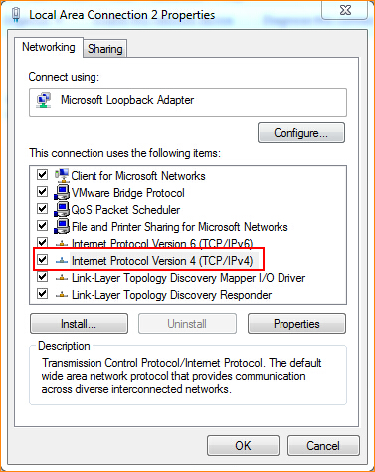
5. Choose Obtain an IP address automatically and Obtain DNS server address automatically and then click OK.
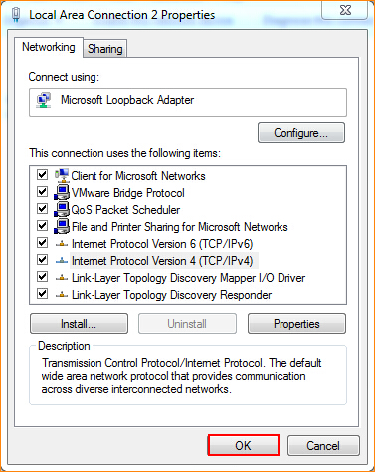
6 Also click on OK on the previous Local Connection Properties window.

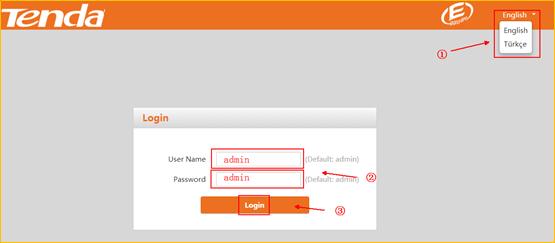
1. Open a web browser, and type 192.168.1.1 in the address bar, press Enter. The login User name and Password both are “admin”.
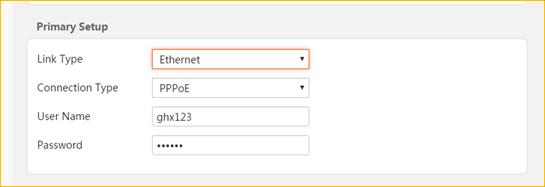
2. After login to the interface, for PPPoE dial up mode, choose Ethernet on Link Type, and PPPoE on Connection Type, then type in the User name and password.
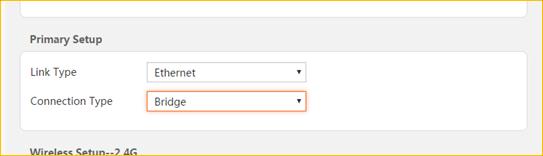
For Bridge mode, choose Ethernet on Link Type, and Bridge on Connection Type.
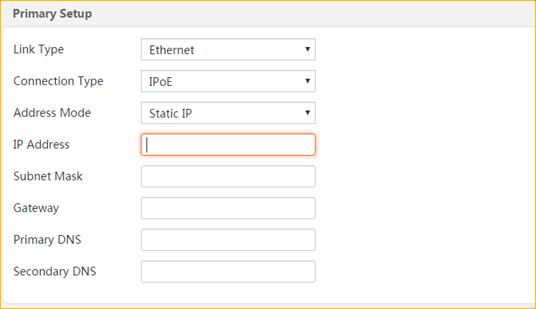
For Static Mode, choose Ethernet on Link Type, IPoE on Connection type, and then type in the IP address, Subnet Mask and Primary DNS.
3. Save the Setting and check the Connection Statue.
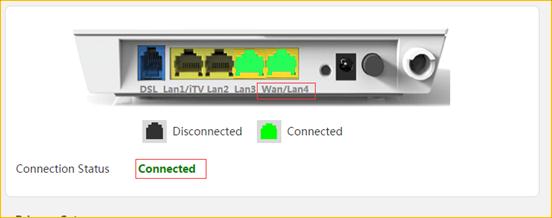

Open any website check whether it can access the internet.