This article will guide you how to setup PPPoE mode and the steps as below.
Model Number: AC6 Question Classification: Internet Settings
Note: If you have no idea about what is the connection type of your internet, please contact ISP to confirm it.
Part 1: Connect the devices
Part 2: Configure your computer
Part 3: Setup the router

your computer with LAN1/LAN2/LAN3ports of AC6 by an Ethernet Cable. Physical connection as bellow:


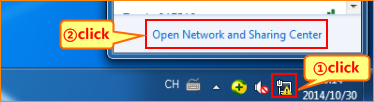
1. Right Click on Network Connection Icon on the system bar, then click on Open Network and Sharing Center.
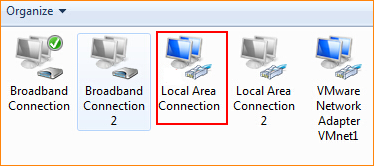
2. Click on Change Adapter Settings.

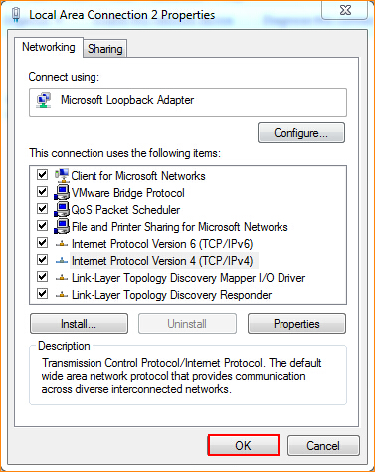
3. Right click on Local Area Connection, then choose the Properties option.
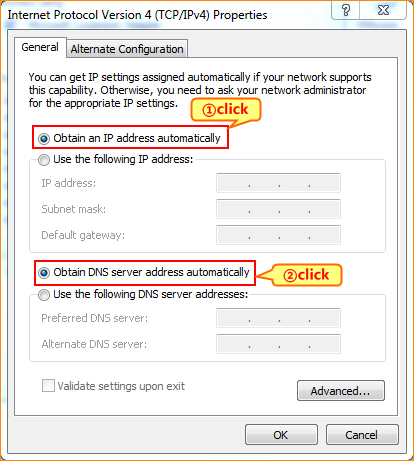
4. Double click on Internet Protocol Version 4(TCP/IPv4).
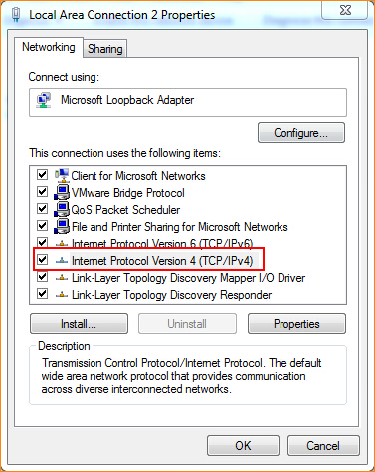
5. Choose Obtain an IP address automatically and Obtain DNS server address automatically and then click OK.
6 Also click on OK on the previous Local Connection Properties window.

1.Open a browser then type //tendawifi.com in the address bar, press Enter. And go to the homepage of the router. Then click “Start”.

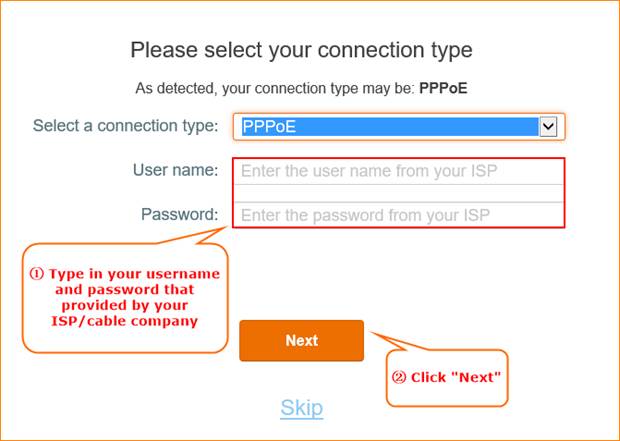
2.Type your username and password that provided by your ISP/Cable Company, click “Next”, the reference as bellow.
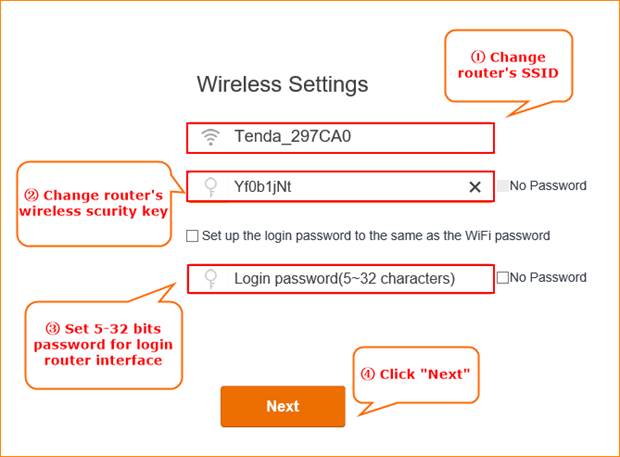
3.Setup the wireless name and password of your WIFI signal, and 5-32 characters homepage login password. Click “Next”.
4. “Setup completely, router is connecting the internet, please wait.” Wait about 10 seconds, it will come out an interface.

5. Type the login password you set before. Click “Login” and turn to the setup page.

6. In router’s setup page, click “Internet Setting.” Check connection status.
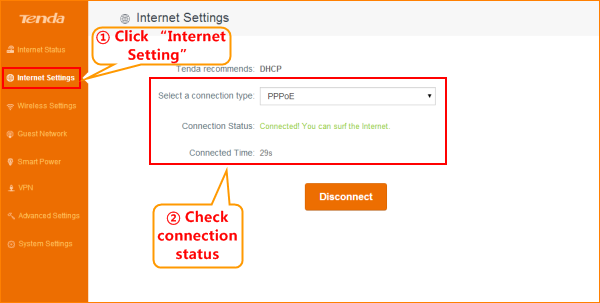

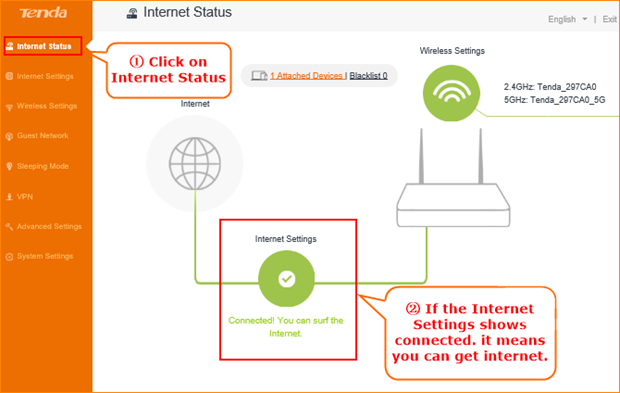
Login the advanced setting page, then click ”Internet Settings” to check the Connection Status if shows “Connected” that means you can access internet.
Notice: when router access the internet, you don’t have to click “broadband connection”, but open the computer and surf the internet; If other computers need to access the internet, connect it to whatever ports of 1/2/3/4, take a reference as step 2, change its local area connection to obtain an IP address automatically and obtain DNS server address automatically, do not need to setup the router again.
NOTE:
When the Connection Status Show Connecting, please try the steps as below.
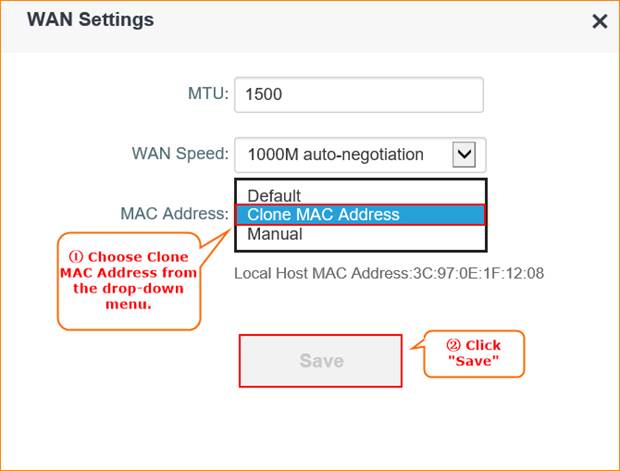
1.Click System SettingsàWAN settings, you will see a pop-up window.
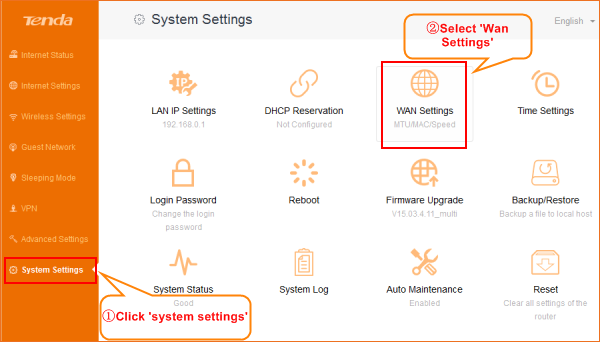
2. In WAN Settings, pelase choose Clone MAC Address in the drop-menu. Then click Save.